Big Green Joe Ribs

Intro

When it comes to Big Green Joe Ribs I prefer them Kansas City style (just like pulled pork) – sweet and sticky with some subtle heat underneath.  There are three things you need: rub, sauce, and a great way to cook them (you also need the ribs themselves – see the ‘Cooking Method’ section below for details).  I’ve traveled the world (wide web) in search of the perfect ribs and here are my borrowed secrets …

Rubs for Ribs

There are hundreds, maybe even thousands of rubs you can buy but I prefer to make my own Kansas City Rib Rub.  Note that I cut the salt in half but it’s just personal preference.  I generally make a big batch and freeze it so it’s ready when needed.

Rib Sauce

Ideally I make a homemade KC Classic Barbecue Sauce.  This sauce is so good I usually eat half of it with a spoon before it ever makes it to the grill.  The downside is it takes some time to prepare and will really stink up your house.

If time is of the essence I will go to a store bought sauce.  I’ve found Ted Reader’s World Famous Crazy Canuck Sticky Chicken & Rib Sauce is a guaranteed winner.  It’s a decent sauce on its own but it really shines when you give it a few minutes on the grill.

Crazy Canuck Sticky Chicken & Rib Sauce

Cooking Method

There are many ways to cook a rib.  I’ve found the hands-down winner to be the 3-2-1 method.  You can find details on this Competition Ribs & 3-2-1 Method on the Major League Grilling blog.   It also includes some great pictures to tempt your taste buds.

Summary

There’s no right or wrong way to make ribs.  Just follow your taste buds and experiment.  Hopefully this gives you some great ideas.  Here are some pictures from my last rib session…

Rubbed Ribs Rubbed Ribs Preping the Big Green Egg Smoking Ribs on the Big Green Egg Smoking Ribs on the Big Green Egg Smoking Ribs on the Big Green Egg Smoking Ribs on the Big Green Egg Cooking Ribs Cooking Ribs Grilling Ribs Grilling Ribs Big Green Egg Ribs ready to eat

Categories: Recipes | Tags: , , , , | 20 Comments


Big Green Egg Turkey

Summary

Thanksgiving, Christmas, Easter…whatever the holiday it seems Turkey is always the go-to protein.  It’s abundant, affordable, tasty, and usually easy.  I only cook one kind of turkey – the Big Green Egg Turkey.  An oven-roasted turkey tends to land somewhere on a spectrum of ‘bad’ to ‘good’.  A Big Green Egg Turkey can only land from ‘great’ to ‘out-of-this-world’.  I haven’t done it on a kettle grill yet but I’m sure the results will still beat the oven.

There are many different recipes out there.  I’ve developed my own hybrid recipe from the version found in the Big Green Egg Cookbook and a series of YouTube videos posted by Patio at Penn Stone.  I’ve been modifying it over the past few holidays and I think it’s now ready to publish.

I’ve also found some great direction and advice from the Turkey Farmers of Canada.  You can follow them on Twitter @TastyTurkey.

Here are the steps to win some fans at your next holiday dinner:

Preparation

Ingredients

  • *1 Turkey
  • 1 Gallon of water
  • 2 cups of brown sugar
  • 1/2 cup of kosher salt
  • 3 yellow onions
  • 4 oranges
  • 4 lemons
  • 2-4 stalk of fresh thyme
  • 3 heads of Garlic
  • **Scoop of butter
  • Salt & Pepper
  • Apple wood and hickory chips

*Use this handy Turkey Calculator to determine the size of bird you’ll need.  A large Big Green Egg can easily accommodate a 20Ibs / 9kg turkey.

**The size of scoop depends on your health quotient but since you’re soaking a bird in sugar and salt I’d say it’s low – so scoop away!

Hardware

  • Plate setter (Big Green Egg only)
  • V-rack to place the bird on
  • Drip pan
  • Aluminum foil
  • Meat Thermometer

Directions

BrineBrine the Turkey

The day before your feast you can prepare brine for the turkey.  This is a crucial step if you want your turkey to fall on the ‘out-of-this-world’ side of the flavor spectrum.

  1. Remove all the extra stuff from the turkey (giblets, neck, etc.).
  2. Mix the following together until everything is dissolved
    1. 1 gallon of water
    2. 2 cups of brown sugar
    3. 1/2 cup of kosher salt
    4. Rind from 1 orange
    5. 2 quartered onions
    6. 1 halved garlic head (fully separate if you have time)
  3. Add the brine and turkey to a pot or bag large enough to hold it all.  Keep as much of the turkey submerged a possible.  Flip the turkey half way through to ensure all of it gets the treatment.
  4. Let sit in the fridge overnight.

IMG_1811


IMG_1813Prepare the Turkey

1-2 hours before you need to start cooking your turkey (lean toward 2 if eggnog will be a part of the preparation process – I highly recommend it with El Dorado 12 year rum and a dash of nutmeg) you can start to get the bird and barbeque ready.

  1. Rinse the turkey.
  2. Stuff it with the following:
    1. Lemons (cut in eighths)
    2. Oranges (cut in eighths)
    3. 1 yellow onion (cut in eighths)
    4. 1 head of garlic (halved or fully separated)
    5. Thyme
  3. Crush 3 cloves of garlic and mix with butter.  Separate the turkey skin from the meat with your hands and spread the garlic butter between the skin and breast.
  4. Brush the outside of the turkey with olive oil.
  5. Salt and pepper the outside of the turkey.

IMG_1820Prepare the BBQ

  1. Add apple wood and hickory chips to water and let them soak for at least 30 minutes.  Use a large amount because you’ll need to add more throughout the cook.  You can substitute other types of wood (pecan for example) but these are my favorites on turkey.
  2. Heat the Big Green Egg to 500-600 degrees to clean it and prepare it for the plate setter.
  3. Add the plate setter at the low height (no grate is required).  If you’re using another type of grill get it ready for indirect grilling.
  4. Bring the temperature back down to 300-350 degrees (25% intake) before you add the bird.

Turkey Cookin'Cook the turkey

  1. Place a drip tray on top of the plate setter.
  2. Put the turkey on the V-rack (usually breast up – although there are different opinions on this) and set it over the drip tray.
  3. Add the wet wood chips to the coals.  The temperature may dip slightly when chips are added but will come back up once they burn up.
  4. Cook at 300 degrees. I tend to cook a bit lower around 250-300 degrees although I think this may be due to a mis-calibration of my thermometer.
  5. Cook the turkey to an internal temperature of 170°F / 77°C in the breast and 180°F / 82°C in the thigh.  For an idea of how long this will take for your turkey visit the Turkey Farmers of Canada Cooking Times & Temperatures page.  I only cook a turkey when I have a good-size crowd to enjoy it so my birds tend to come in around 20Ibs / 9kg and take about 5.5 hours to cook.
  6. Check the bird half way through cooking to ensure the skin isn’t burning.  If so, tent it with tin foil.  Don’t get lazy and skip this step.  It will greatly increase the visual appeal of your turkey and prevent your dinners from avoiding the black mess you set on the table.

Cooked Turkey

Ready to eat

Carve the Turkey

I’m about 100 times better at cooking a turkey than carving it.  For some directions on carving your bird and storing your leftovers take some advise from the experts…

Enjoy your bird and be sure to share your experiences and other great turkey recipes in the comments section below.

Happy Holidays!

Categories: Recipes | Tags: , , , | 56 Comments


Great Canadian BBQ

Canada is not known for great weather but we love BBQ just the same.  So come wind, rain, snow, ice, and whatever else Mother Nature wants to throw at us, we still light up the grill and enjoy some great Canadian BBQ.

Today marked the first real snowfall in Waterloo, ON.  Despite the cold temperatures and howling wind I will still be firing up my Big Green Egg and grilling some steaks.  For the best way to grill a steak see Last Nights Perfect Steaks.

So here’s to the hardy, die-hard Canadian Grillers out there.  May your grill heat your food, your hands, and your taste buds!

Categories: Uncategorized | 8 Comments


Big Green Egg Pulled Pork: Kansas City Style

There are many styles of BBQ and I enjoy most but my favorite has to be Kansas City style.  Low and slow, sweet and spicy, thick and juicy – you can’t beat it!  I recently threw a surprise birthday party for my fantastic mother and knew there was only one way to truly show our appreciation for her – Big Green Egg Pulled Pork: Kansas City Style.

I spent many hours scouring the Internet and flipping through cookbooks to find the perfect combination of components that would come together for this feast.  Below is the final recipe.  It needs no further modification and will long live as my standard pulled pork recipe.

Big Green Egg Pulled Pork: Kansas City Style

Like all great barbecue there is no easy way to great taste.  It’s not as simple as throwing some meat on a flame then eating it.  This recipe has several components that all work together to make this masterpiece:

  1. Meat
  2. Dry Rub
  3. Sauce
  4. Injection Fluid
  5. Cooking & Pulling

Preparring Pulled PorkMeat

I go with the standard cut for pulled pork – a Boston Butt.  Despite the name, this is actually pork shoulder.  I prefer bone-in with a thick layer of fat.  The size depends on how many people are eating but I find about 8 lbs is usually a nice, tasty size.  I get mine from Brady’s Meat & Deli in Waterloo, ON.
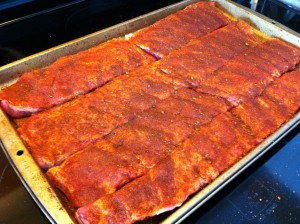
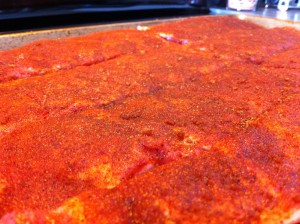
 

Rub

I found a great Kansas City dry rub by Derrick Riches on About.com’s BBQ & Grilling site.  You can find the recipe here.  I cut out the salt because I’m pretending to eat healthy but I’m sure it taste great with it too.

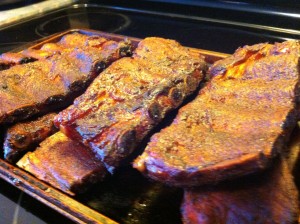
The afternoon or evening before cooking I cut the blanket off the pork leaving as much fat as possible.  Then I ‘rub the rub’ into the shoulder and pop it in the fridge until it’s time to cook.  At this time I also prepare the sauce and injection fluid.
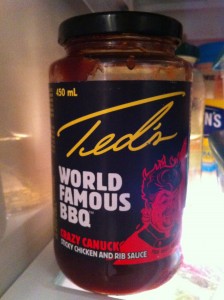
Kansas City RubRubbed Boston Butt

Sauce

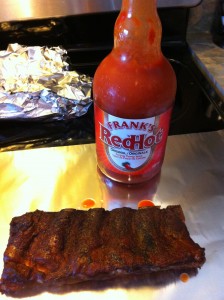
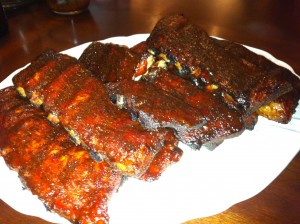
The only way I can describe this sauce is ‘stupid good’.  When I was cooking up my first batch I became worried I had over-dosed on vinegar because of the strong smell (this is actually normal).  I tasted a spoonful to make sure I was still on track then proceeded to eat a bowl of the sauce – it’s really that amazing.  It gracefully slides into your mouth with a thick, sweet taste courtesy of the brown sugar and molasses.  Then it gently punches your taste buds with a fist full of heat that quickly disappears leaving you wanting more.  This sauce will forever more have a place in my fridge.

Kansas City Sauce IngredientsCooking Kansas City Sauce

Joe's Kansas City Sauce

I came across the recipe on AmazineRibs.com.  You can find it here.  I use about 3/4 of the listed vinegar.  You can increase/decrease depending on how tart you like your sauce.  You can also raise or lower the heat depend on your preference.  This sauce is designed to be double-cooked; once when it’s mixed then again on your meat while it’s cooking.  However, I find it’s just as good slathered on meat after it’s been cooked.
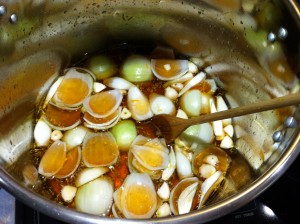
Injection Fluid

This component is by far the fastest and simplest to prepare.  I simply mix the ingredients in a jar and it’s done.  The actual injection doesn’t happen until right before the meet goes on the Big Green Egg but it’s nice to have it ready before hand.  I’m not sure where I came up with this concoction but I assume it’s a hybrid of several different recipes.  Here’s what I use:

  • 3/4 cup apple juice
  • 1/2 cup water
  • 1/2 cup sugar
  • 1/4 cup salt
  • 2 tablespoons Worcestershire

Cooking & Pulling

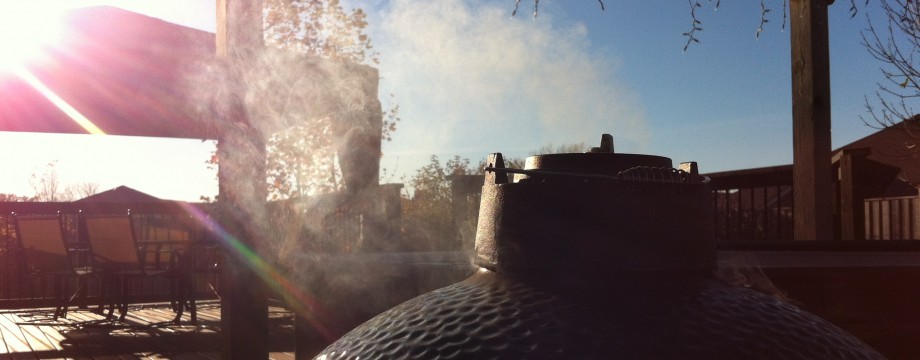
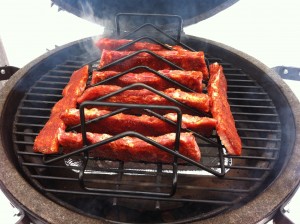
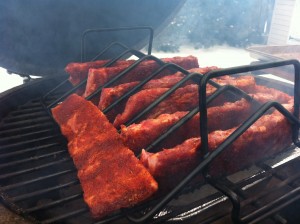
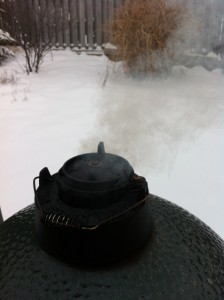
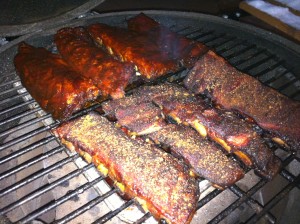
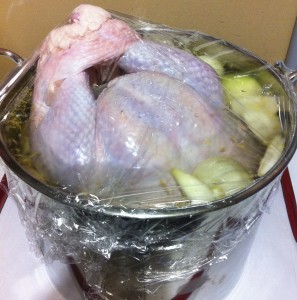
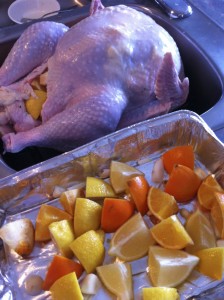
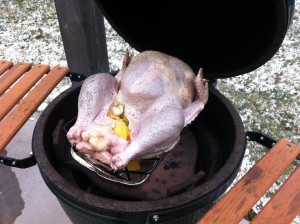
The final steps are where everything comes together.  I get up at 2:30am to get things going.  First I mix wood chips and set them to soak.  I use hickory, apple wood, and a touch of maple.  Next I light the Big Green Egg.  While it’s warming I inject the meat with the injection fluid.  When the temperature is up to about 250 degrees I drop in about a third of the wood chips, load the plate setter, place a drip pan on it, place the grill on top, and add the pork.  There’s a long-standing debate about whether to place the fat cap up or down.  I’m not married to either method so I just add it whichever way it happens to be sitting after I run it.

Lighting a Big Green Egg at 3amInjecting a Boston Butt

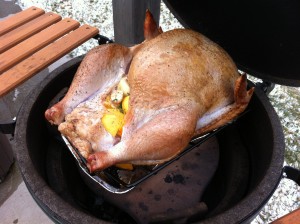
With the addition of the wood chips and plate setter the temperature drops a few degrees.  The goal for the pork is to reach an internal temperature of 195 degrees.  At this temperature the connective tissue in the meat breaks down making it easy to pull.  To get to 195 degrees I cook at about 210-225 degrees for 1.5 hours per pound.  At 8 pounds it’s a 12 hours cook.

Pork Shoulder at 3am

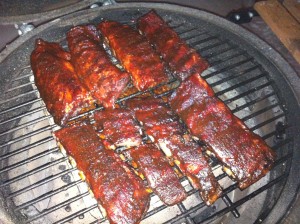
I don’t touch the meat for the first 4-5 hours (mainly because I’m back in bed sleeping or feeding kids breakfast) but I check it occasionally after that.  Each time I spray the shoulder with apple juice and add some wood chips.  For the last few hours I don’t add any more smoke.  At this point in the cook the pores in the meat have closed due to the heat so smoke won’t be absorbed and can even give the meat a chemical taste.

Boston Butt on the Big Green EggPork Shoulder on the Big Green Egg

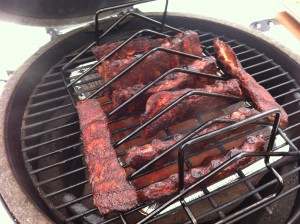
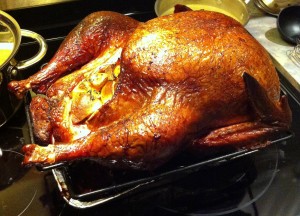
Once the meat is at 195 degrees I pull it off the Big Green Egg and wrap it tin foil.  I let it rest at least an hour or even longer if the rest of the meal isn’t ready.  The meat holds the heat for a long time so there’s no rush.

Resting Pork Shoulder

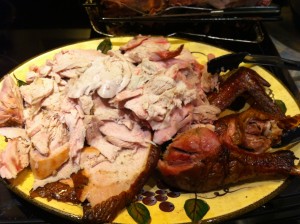
Just before the meal is served I unwrap the shoulder and place it in a serving dish.  Then comes the best part of the process: I pull out the bone.  You have to do it to truly appreciate the beauty.  The bone is lodged in there before the cook but after it slides out like it’s coated in butter.  Then I squash the meat with my hand and watch it fall to pieces.  I finish by pulling the remaining chunks of meat into smaller pieces using a pair of forks.

To serve I pile the pork on a warm bun and douse it in the sauce.  Then it’s chow time!  I usually put back a pile without the bun just to get a pure taste of the masterpiece.  I’ve cooked a lot of things on m Big Green Egg but this is by far my favorite.  It’s an investment in time to prepare and cook but it’s well worth every minute.

Big Green Egg Pulled Pork: Kansas City StylePulled Pork on a Bun

Categories: Recipes | Tags: , , , , , , , , | 320 Comments


Sweet & Garlicky Pork Loin Roast on The Big Green Egg

A couple weeks ago I tried a new technique with pork and the results were great – so great that one of my guests went into labour shortly after eating. Yes, the Big Green Egg is so good that even unborn babies are finding new ways to get at it.

Sweet & Garlicky MixturePork Loin Roast

My pork experiment was to inject a pork loin roast with seasoning.  Not a groundbreaking technique but a new one for me.  The final result was a moist roast loaded with flavor.  This recipe is based on Steve Raichlen’s Sweet & Garlicky Pork Chops from his book The Barbeque! Bible.  Here’s how it went…

Injecting the roastPork Loid Roast Ready for the Grill

Ingredients

  • 1 Pork Loin Roast
  • 5 cloves of Garlic
  • 5 tablespoons of Brown Sugar
  • 1/3 cup of Soy Sauce
  • 2 tablespoons of Sesame Oil
  • 3 tablespoons of Honey
  • 1/2 teaspoon of ground Ginger powder
  • 2 teaspoons of finely ground Black Pepper

Pork Loin Roast on The Big Green EggFinished Pork Loin Roast

Directions

  1. Combine garlic, 2 tablespoons of brown sugar, soy sauce, sesame oil, honey, ground ginger, and 1 teaspoon black pepper.  Blend in a food processor or grind to a paste with a mortar and pestle.
  2. Inject the paste into the roast using a meat injector. 20-30 injection points should give a good spread.
  3. Combine the remaining brown sugar and pepper.  Rub over the roast.
  4. Let roast sit in fridge overnight.
  5. Heat your Big Green Egg to 350-400 degrees (medium indirect heat if you’re not using a Big Green Egg) and soak apple wood chips.
  6. When ready to cook, drain the apple wood chips and add to the coals.  Spread them around so they burn with the charcoal throughout the cooking period.
  7. Place the roast on a rack and place in a drip pan and place directly on the grill (you can also use a plate setter if you wish).
  8. Cook the roast for 1-1.5 hours to at least 160 degrees.
  9. Once at temperature, remove the roast and let sit for 20 minutes.
  10. Slice the roast and serve!

 Pork Loin Roast on the TableInjection Flavour Pockets in Pork Loin Roast

Categories: Recipes | Tags: , , , , , | 27 Comments


Bacon Makes Everything Better

As this fantastic stretch of weather lingers, my Big Green Egg and Corona bottle opener continue to get a good workout.  Last night we went with bacon wrapped chicken.

Bacon Wrapped Chicken before the GrillChicken on the Big Green Egg

I grilled it over 325° heat and used a mixture of apple wood and hickory wood chips to give it a little smoke.

Chicken GrillingSmoke from the Big Green Egg

As you would expect from anything wrapped in fat, the chicken turned out perfect; juicy and smoky.  Bacon makes it better!

Bacon Wrapped Chicken on the Plate

Let’s eat!

Categories: On The Egg | Tags: , , , , , | 10 Comments


Nashville Style Hot Chikan Shak Chicken

Yesterday I had the pleasure of sitting down for lunch with my Dad at the Lancaster Smoke House in Kitchener.  It was his first time there and he seemed impressed.  He went with the Hog Tails Signature BBQ Chicken Sandwich.  I’ve had this before and you can’t go wrong.  The General does a lot of things right and chicken is certainly one of them.  I went with my favorite: the Nashville Style Hot Chikan Shak Chicken…

Nashville Style Hot Chikan Shak Chicken

Nashville Style Hot Chikan Shak Chicken

The General’s Southern Fried Chicken – kicked up ten notches! We fry a jumbo marinated and smoked chicken thigh in our secret spicy coating, then douse it in our “Fullilove” Hot BBQ Sauce. Served open-faced on a Portuguese bun with pickles on top – just like at Prince’s Hot Chikan Shack in Nashville!

Surprisingly, it’s the pickles that bring everything together.  Each element is great on its own but the pickles tie a knot around it all and take it to another level.  I can’t get enough!

The next time your at Hog Tails or the Lancaster Smoke House make sure to try this dish.  A+!

Categories: Experiences | Tags: , | 10 Comments


Last Nights Perfect Steaks

Losts of Great SidesI recently put up a post discussing methods used to cook steak.  Some tweets followed and @truenorthbbq linked me up with some tips on how to grill perfect steaks.

Last night I gave this ‘perfect method’ a try on some tenderloins and it delivered big time.  I won’t post the process in detail but you can view it on the True North Barbeque blog: How to Grill Perfect Steaks.  The steaks were also accompanied by some great sides; roasted potatoes with onions, asparagus, and baby garlic (which ended up slightly overcooked).

Searing the Perfect SteaksI fell short in a couple areas of the ‘perfect method’ and learned a few lessons…

  1. My ‘death sear’ on the Big Green Egg was only about 650-700 degrees so I left the steaks on a few seconds longer.  When I say a ‘few’ I mean it literally.  At a recommended 1000 degrees the ‘death sear’ is not a joke.  Think of holding your breath – a few seconds at the end can make a world of difference.  Next time I’ll use some cocoanut charcoal or a hair dryer to get the temperature up to the recommended 1000 degrees.
  2. Perfect SteaksI over seasoned during the rest period.  I’m used to seasoning steaks before they are seared so I’m fairly liberal.  When using the ‘perfect method’ you season before a low cook, which does not burn off the seasoning.  Next time I’ll be more conservative.
  3. My theory that seared meat does not absorb smoke as well as raw meat was disproved.  I swear I could taste smoke in the pink middle.

The Perfect MealWhen all was said and done we ate world-class steak last night.  Given this was my first attempt at the perfect method (there is still lots of room for improvement in my execution) and it turned out so well, I’d say this method is an absolute winner.

A big thanks to @truenorthbbq for the great advice and many tasty nights ahead!

Categories: Techniques | Tags: , , , , | 16 Comments


BBQ Nachos by The General

Yep, this exists but it’s nothing like you imagined.

At some point in my BBQ career I had imagined I’d try tossing some cheese, fresh veggies, maybe some pre-cooked ground meet, and salsa on nachos and baking them on my Big Green Egg.  However, after a recent trip to The Lancaster Smokehouse in Kitchener I’ve had my eyes opened to an entirely new method of BBQ nachos – a true BBQ version of this tasty dish.

Spread at the Lancaster SmokehouseHere’s what The General does at the Smokehouse…he sprinkles shredded cheese on top of nachos and serves sliced peppers, fresh salsa and sour cream along side.

Oh wait, I almost forgot to mention they pile about 45 lbs of the juiciest pulled pork you’ve ever tasted on top of the nachos.  It melts the cheese and adds about four inches to the height of the dish.

45 lbs may be a slight exaggeration but I can guarantee this is the meatiest plat of nachos you can get.  Besides being extremely tasty and filling, this also comes in at the standard nacho price making it the best value when it comes to maximizing your meat intake.  Don’t be fooled – this is not an appetizer.

I’m looking forward to my next trip to KW’s best BBQ joint!

Categories: Experiences | Tags: , , | 16 Comments


How do you grill your steak?

There are two schools when it comes to cooking steak; the ‘low and slow’ method and the super-heated sear tactic.

Steaks on the Big Green EggLow and slow is less harsh and leaves the meat tender and juicy as long as you don’t go too slowly.  Time can range from 20-40 minutes depending on the size of the steak, temperature of the grill, and your preference.  This method also allows you to add some smoke to the meat – I always use mesquite for steaks.

Searing is the complete opposite.  The goal is to get your grill as hot as possible.  A Big Green Egg will usually get up to 600 degrees on it’s own (see video below).  Adding some additional air via a hair dryer can jack it up to 700-800 degrees and potentially higher.  This intense heat is used to sear the outside of the steak locking in all of the juices.  A few minutes on each side and the steaks are ready.  You can even take this method to the next level and toss the meat right on the grill like Mad Meat Genius.

Most grillers I talk to swear by one of the methods above.  They can talk for hours about how well their methods works while calling the opposing camp crazy…even though they’ve never tried it.  This leads me to believe that both methods work great.

Steak on a plateA quick note – no matter which method you use ALWAYS let your steak sit for 5-15 minutes after you take it off the grill.  This gives the juices time to migrate though out the steak so it’s equally juicy and tender all around.

I typically sear my steaks.  However, I’ve always been disappointed that I can’t add some smoke.  Since a large volume of oxygen is required to get the high temperature, any smoke that’s generated quickly goes out the top.  To get around this I’ve been using a hybrid method.  I sear my steaks for 2-3 minutes a side then drop the temperature and let them soak for another 5-15 depending on this size.  During this soaking period I can smoke the hell out of them.  I typically add mesquite chunks (not chips) to the coals before adding the meat.  Because of their large size they can survive the sear period and still throw up some smoke during the soaking period.

The problem I run into is my smoke absorption theory.  This theory is backed by absolutely no scientific data or any experience whatsoever.  The theory is this; raw meat will absolve smoke flavor better than cooked meat.  This means my hybrid approach of smoking the meat after it’s been seared is not going to be as effective as I’d like.  I’ve lived with it and enjoyed some great steaks but I’ve always wished there was a way around this.  Well, now there is…

Nature's Grilling Mesquite CharcoalOn a recent trip to Canadian Tire (or as I like to call it ‘the black hole where my bank account goes to die) I came across natural mesquite charcoal.  I immediately filled my cart and proceeded to the checkout.  This brilliant idea allows me to impart a fantastic mesquite flavor on my steaks while I sear the raw meat.  Excellent!

The downside is this particular brand, Nature’s Grilling, is not cheap since it’s all-natural and doesn’t contain all the toxic additives found in some other brands.  The good news is that, at the time of posting this, it’s on sale!

Mesquite CharcoalA quick Google search revealed an endless list of mesquite charcoal brands which tells me this is an old idea that is new to me because of a recent mesquite distribution expansion.  Either way I’m pumped.

If you’re a fan of cooking steak over charcoal I highly recommend grabbing a bag and giving it a shot.

Categories: Techniques | Tags: , , , , | 11 Comments


Big Green Egg Burgers by The Culinary Studio

Earlier this week I mentioned that The Culinary Studio in Kitchener would be serving Big Green Burgers as part of their ‘Friday Hot Lunch Take-Out’ this week.  I dropped by for one and I have to say I’m a little disappointed.  I was hoping to enjoy the familiar flavors I cook up on my Big Green Egg.  Instead, the burger rudely reminded me that my skills as an amateur griller are pretty weak.  Despite cooking up some fantastic patties in my day I’m really nowhere near the true potential of the Big Green Egg.  Today was more like a ‘Friday Hot Slap-in-the-face’.

Big Green Egg at The Culinary Studio Burger Prep at The Culinary Studio

This burger was top notch…a Sir Mix-a-lot special (“real thick, and juicy”).  This and any great burger has three things:

  1. A well prepared patty.  I didn’t get a good look at what was in this patty because it only lasted about 8 seconds before it hit the bottom of my stomach.  However, I can tell you that it had a smooth seasoning and what looked like finely diced garlic inside.
  2. Great cooking.  This was cooked perfectly – juicy with a great smoke.  Exactly what you’d expect from the Big Green Egg.
  3. High quality toppings.  This little chunk of heaven came with house made ketchup, aioli, caramelized onions and 2 year old cheddar.  Slightly fancier than the ketchup and mustard burgers I throw together.

The Culinary Studio Interior The Culinary Studio Big Green Egg Burger

I’ll be keeping my eyes open for the next time they offer a ‘Friday Hot Lunch Take-Out’ from the Big Green Egg.  I may also join one of their classes and steal some secrets.

Categories: Events | Tags: , , | 16 Comments


Cedar Plank Salmon on the Big Green Egg

Planked Salmon on the GrillOne of the first dishes I tried on a charcoal grill is cedar plank salmon.  Despite its simplicity it was a huge success and an immediate favorite. I’m not sure where I found this recipe so please let me know if it’s yours.

Last night was my wife’s birthday and great weather for a BBQ so I went with this this faithful treat.  I also did some potatoes (with onions, butter, salt, and pepper), broccoli, and grilled cheese sandwiches in case the kids weren’t in the mood for fish…although I ended up eating the sandwiches.

Potatoes with onionsHere’s what you’ll need:

  • Salmon (as much as you need)
  • Soy Sauce
  • Sesame Oil
  • Red Pepper Flakes
  • Cedar Plank
  • Pieces of the last Cedar Plank you used

This is a forgiving recipe so you can modify and still get great results.  Here are the basic steps:

    1. Salmon Grilling on the Big Gree EggSoak you cedar plank in water.  This is optional – I’ve skipped this step everything turned out just fine.
    2. Soak the pieces of the last cedar plank you used in different water.  I typically split the old plank into ½ inch strips by using the claws of a hammer as an axe.  Splitting down the grain is easy on these dried out prices of lumber.  It may also be a good idea to break the strips in half.  Soaking these pieces is not an optional step.  Burning the wet wood release a lot of moisture which the Big Green Egg is excellent at maintaining.  Using dry wood directly on the coals will also cause the wood to burn up in a matter of seconds so you won’t get an extended smoke.
    3. Light your Big Green Egg and heat to about 300 degrees.  Last night I actually lit it 1.5 hours before I started cooking.  I tossed a few potatoes on low heat while I finished work and picked up the kids.  By the time I was back the potatoes were cooked and the Big Green Egg was ready for the salmon.
    4. 300 Degrees on the Big Green EggPrepare the board by removing it from the water, sprinkling some sea salt on it and placing it on the grill.  When the sea salt begins to pop it’s ready for fish.  This step is designed to get your board smoking before you start cooking the fish.  Since I use extra cedar directly on the coals this step is less important to follow.
    5. Mix 3 parts soy sauce with 1 part sesame oil.  I typically don’t measure this and it always tastes good as long as your proportions are close.  Be sure to mix them well.  I usually shake them.
    6. Rinse and wipe the salmon.  Drying the fish will allow the soy sauce/sesame oil mixture to get some traction.
    7. Add your pieces of cedar directly to the coals.  This will throw up some great smoke and really take the fish to the next level.  Check out the video below to see what I’m talking about.

  1. Place the salmon on the cedar plank and brush it with the soy sauce/sesame oil mixture.  Don’t do this too early or the fish will become mushy.
  2.  Sprinkle some red pepper flakes over the fish.  Skip this step to make this a child friendly recipe.
  3. Cook for about 15-20 minutes.  You’ll know the fish is done when it flakes all the way through.  I follow two rules when cooking salmon.  First, never overcook it.  Salmon can go from perfect to dust in about a minute so be careful.  Second, if I’m not sure if it’s done – then it’s definitely done.

Checking Salmon for DonenessWhen your salmon is ready you can pull it off the grill and serve it on the plank.  Be sure the put it on some kind of dish or baking sheet (not fancy but it works) because the bottom will be a charred mess.  The plank will give off an aroma so heavenly your neighbors may show up.  Enjoy!

Categories: Recipes | Tags: , , , , | 21 Comments


Big Green Egg Friday in Kitchener and Waterloo

It’s a big week for the Big Green Egg in Kitchener/Waterloo!  If you’re new to the Big Green Egg Friday is your perfect chance to see what it’s all about at The Culinary Studio.

Friday May 25th from 11:30am they will be serving Big Green Burgers as part of their ‘Friday Hot Lunch Take-Out’.  $10 gets you a burger with house made ketchup, aioli, caramelized onions and 2 year old cheddar followed by homemade dessert.

Friday night they are offering a course called ‘Great Grilling on the Big Green Egg!’  Matthew Bast, one of my go-to Eggxpert at Bast Home Comfort in Waterloo, will be teaching the class how to grill everything from steak to salad and pizza on a Big Green Egg.  If this class sounds interesting to you I’d highly recommend registering quickly because there was only 1 spot left at the time this post went live.

I should mention that I have no affiliation to The Culinary Studio and have not had the pleasure of taking any of their courses (due to my mess of a schedule).  However, I do have several friends/family members who have taken courses and absolutely love it.  Although I haven’t made it to a class I will certainly be there Friday afternoon with $10 (possible $20) and a big appetite!

Categories: Events | Tags: , , | 155 Comments


Simple Grilled Asparagus

Grilled AsparagusTwo factors that keep me firmly rooted in amateur grilling and prevent me from diving into the professional realm are the fact that I don’t have professional caliber grill skill and I don’t have a lot of time (a side effect of having a couple wonderful children).  Because of this I’m a firm believer in quick and easy recipes.  One of our all-time fav side dishes is grilled asparagus.

Here’s what you’ll need:

  • Asparagus
  • Balsamic Salad Dressing (we prefer Kraft but I’m sure they’re all the same)

Keeping with the ‘simple’ trend, here are the steps to get these puppies on your plate:

  1. Grilled AsparagusWash the asparagus and cut the bottom ends off.
  2. Put them in a dish and drizzle ¼ to ½ a cup of balsamic dressing on them.  Toss to ensure they are somewhat covered and let them sit while you setup your grill.
  3. Setup your grill for 250-300 degree direct heat.  If you’re using wood chips to smoke your meat later be sure NOT to add it for the asparagus.  Charcoal will give it enough smoke flavor.  Note that these instructions are for a Big Green Egg – other grills may vary.
  4. Toss the asparagus on the grill for 5-10 minutes a side.  You want to see a little black on all sides but don’t burn them or they’ll turn into hollow asparagus fries.
  5. Take them off the grill and cook your meat.

Despite the taste you won’t believe the flavor these little guys pack.  Happy grilling!


Update – May 26, 2013

  • I recommend grilling your asparagus after your meat while the meat rests. If you’re grilling steak and want to avoid smoking the asparagus you can grill it during the rest period before you smoke the steaks.
  • I’ve also been cooking it at a little higher heat (350-400 degrees) on my Big Green Egg for 3 minutes a side.  This seems to turn out perfect.
Categories: Recipes | Tags: , , , | 15 Comments


Welcome to Big Green Joe!

Hello and welcome to my Big Green Joe BBQ blog!

Here you can read about what’s grilling and what’s burning in my backyard.  I’ll share my experiences and favorite recipes as well as techniques that are working and those that have gone up in smoke.

Some quick background on myself – my name is Joe.  Contrary to this blogs name I’m not actually that big and most often not green. I have several grills ranging from gas to charcoal with my prize jewel being my Big Green Egg.  I don’t fancy myself an expert griller by any means – I’m simply enjoying life as an amateur grill enthusiast and hoping to share some great stories with others that simply love cooking over fire.

I hope you enjoy my tales from the pit and invite you to share your own in the comments section.  Let’s have some fun and remember to keep your grill hot and your drink cold!

Cheers,
Joe


Categories: Big Green Joe | 11 Comments

Proudly powered by WordPress Theme: Adventure Journal by Contexture International.